
上电需要0.5兆欧

RA4L1-SENSOR+开启测评第一步例程探索
便于观看首先贴上板卡美图: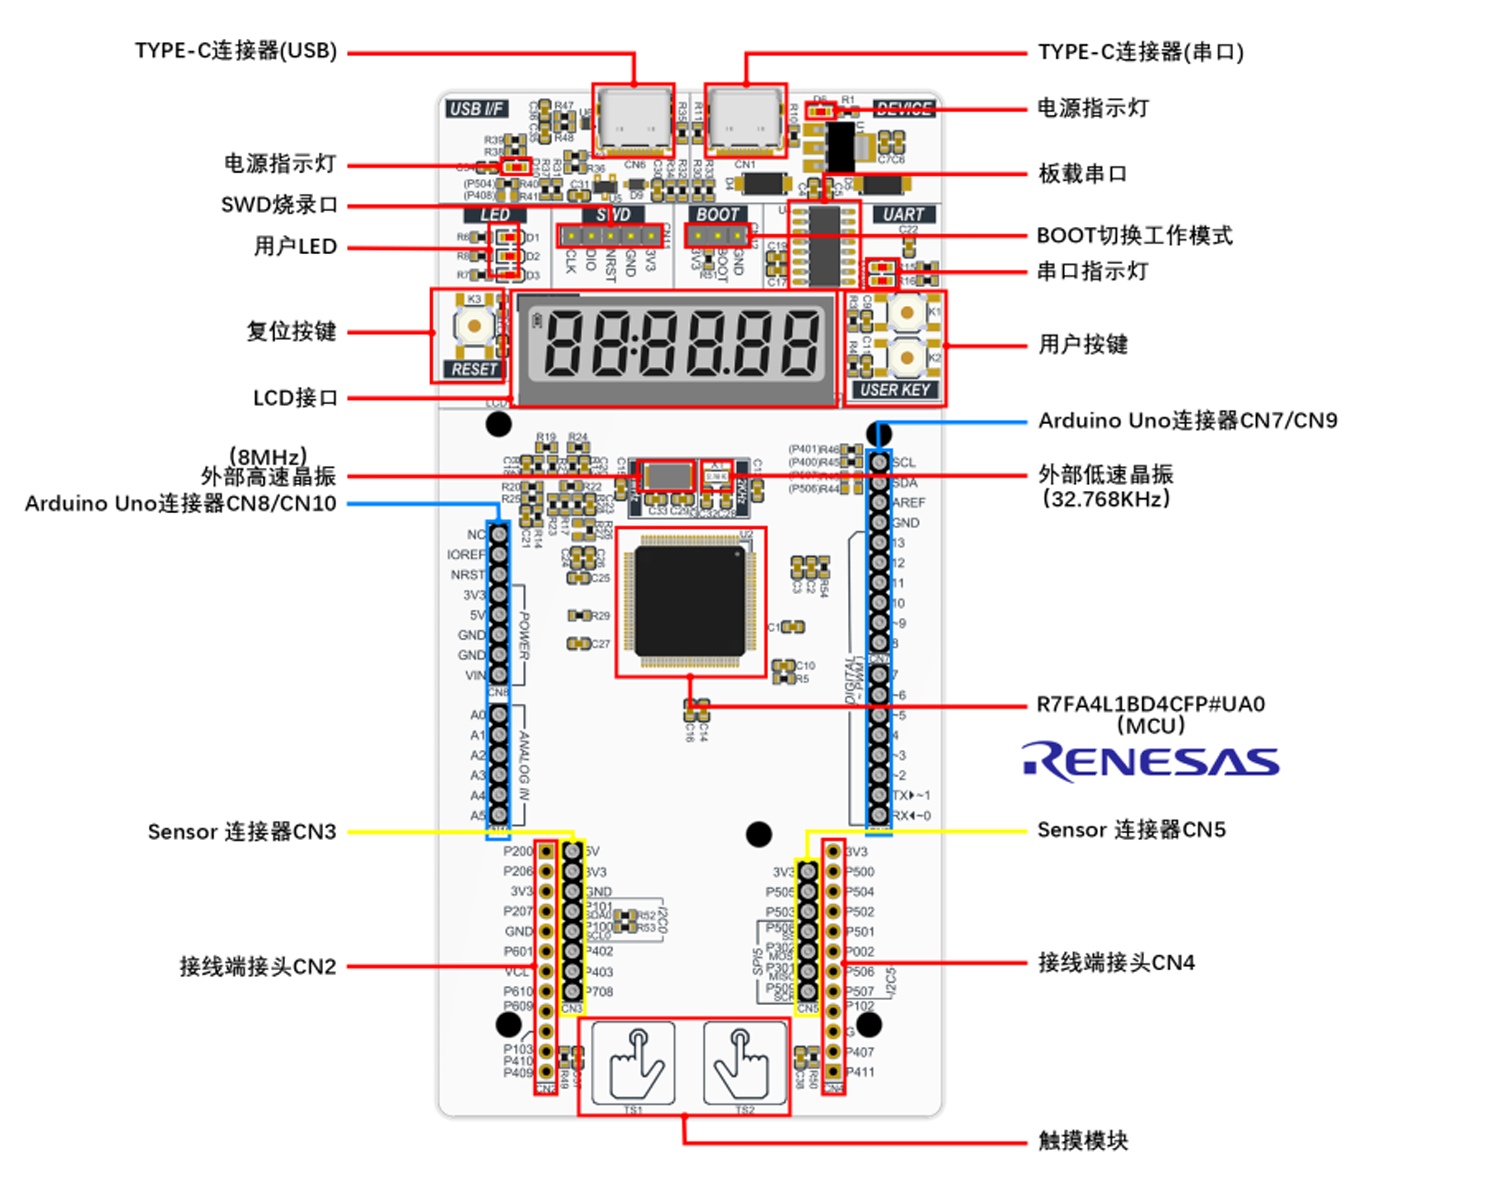
包括传感器(SENSOR)系列接口、Arduino Uno 扩展接口,并提供对微控制器所有引脚的通孔访问,大大提升了系统的扩展性,助力开发者在高效、灵活的开发环境中进行创新设计。
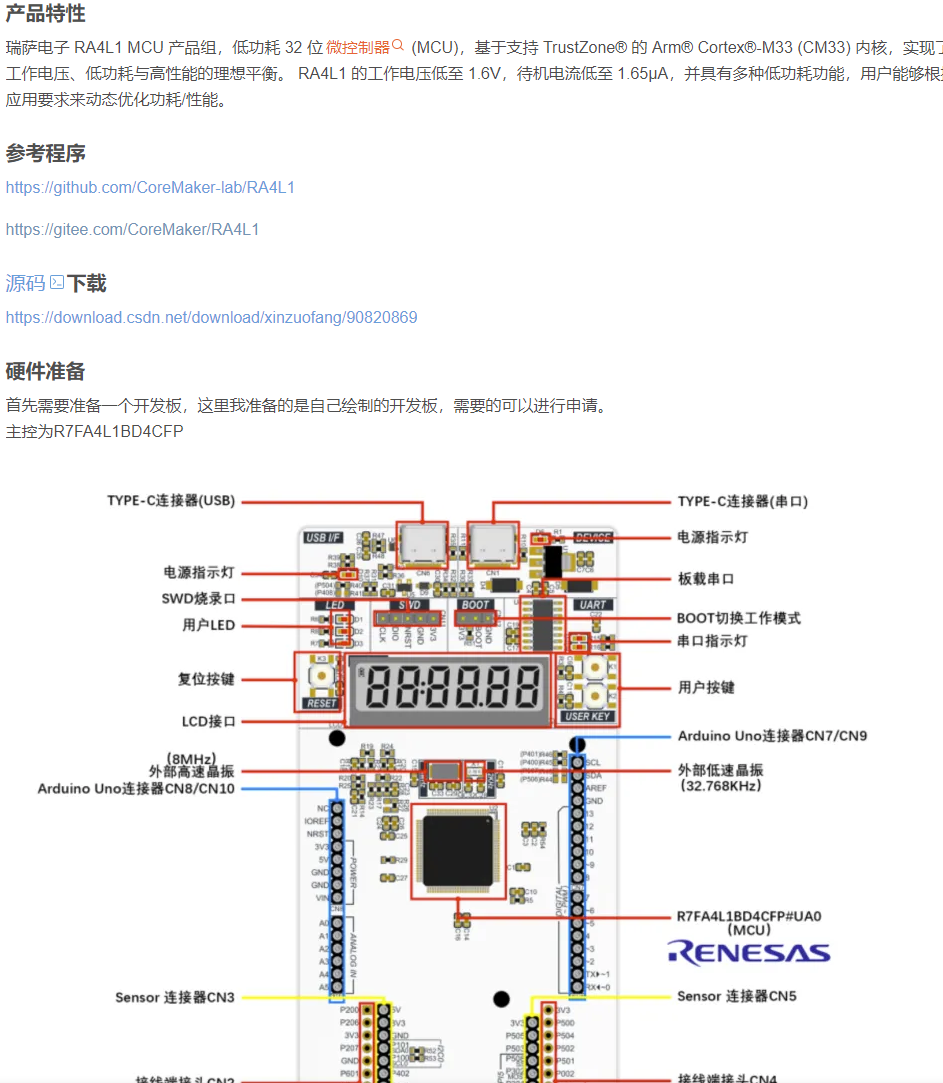
特性:
- 内核:支持 TrustZone 的 Arm® Cortex®-M33,频率高达 80MHz,Armv8-M 架构
- 存储器:高达 512kB 的 Flash,64kB 的 SRAM、8kB 的 Data Flash
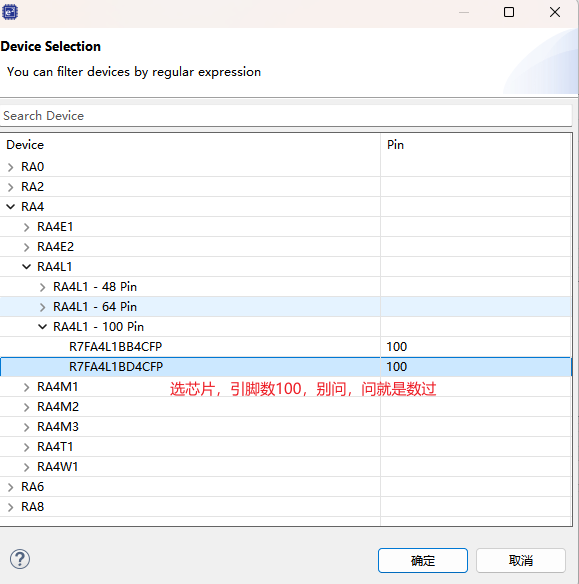
- 引脚:100-pin,LQFP 封装
- 温度:-40°C 至 125°C
- 电压范围:1.6 V 至 3.6 V
- 低功耗特性
– 3.5µS 内快速唤醒(从 MOCO)
– 2 个支持 32kHz 的低功耗 UART 接口
– 从低功耗唤醒后系统无需回到复位向量,避免冲击电流对系统带来的影响。
- 安全加密, 具备独特的密钥管理机制,保护关键 IP 和算法
– 搭载瑞萨安全 IP(RSIP-E11A)
– AES 对称算法
– ECC 非对称算法
– 支持 32KB 奇偶校验
– TANG
– 唯一 ID
– SHA
- 168µA/MHz 工作电流、1.65µA 待机电流
- 6 个 SCI 多功能串口(UART、简单 SPI、简单 I2C)
- 独立 SPI/I2C 多主接口
- I3C 接口
- CAN FD
- 支持 XIP 的四线 SPI
- 32 位和 16 位定时器,32 位超低功耗定时器
- 2 x 看门狗定时器
- 实时时钟 (RTC)
- 12 位 ADC 和 12 位 DAC
- 低功耗模拟比较器、温度传感器
- 8 x 48 段码 LCD 驱动器
- 12 通道电容式触摸
- 串行音频接口 (SSI)
根据教程视频放大得知编译器为:e2stduio
通过官网查询下,嗯,页面过于复杂不想用,有识之士可以找找看,附官网地址:
https://link.zhihu.com/?target=https%3A//www2.renesas.cn/cn/zh/software-tool/e-studio
最新版是2025。
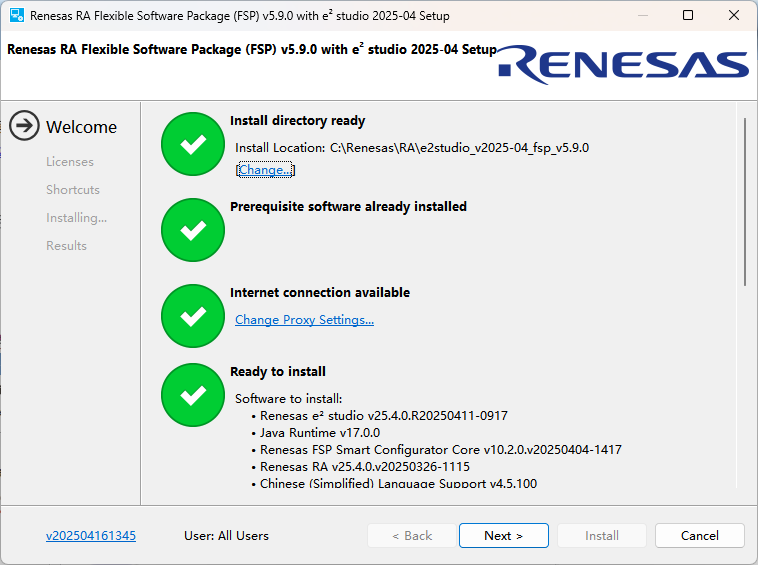
下载完成之后,弹出软件安装界面,点击 Change 可修改软件安装路径,等所有灯变成绿色,点击 Next

安装完成之后可以看看文档例程:
标准CSDN,劝退了。一天之后,我到QQ群找了群主,重置帖子放开了。

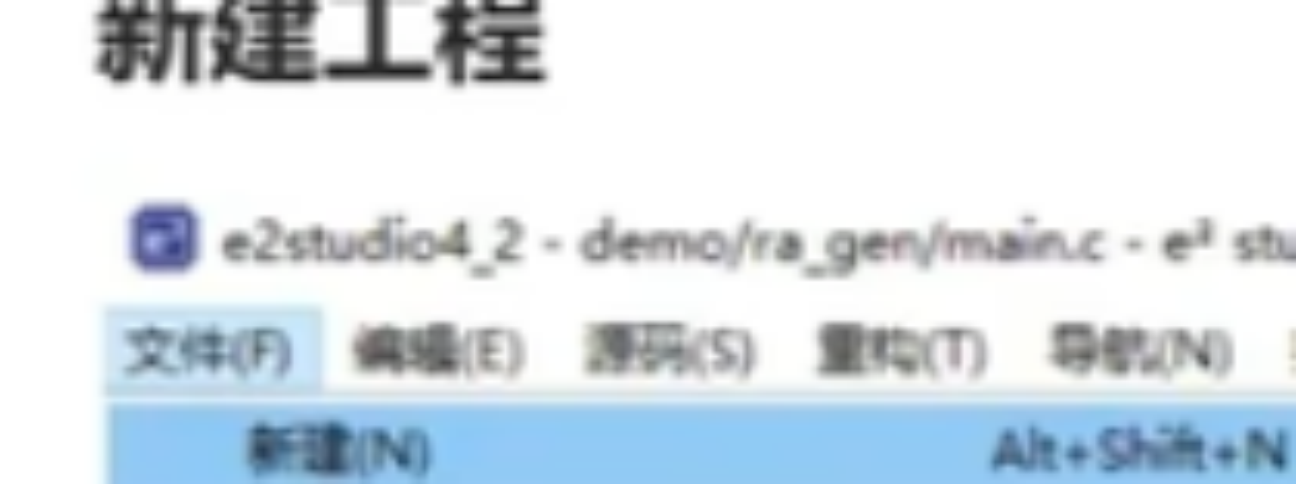
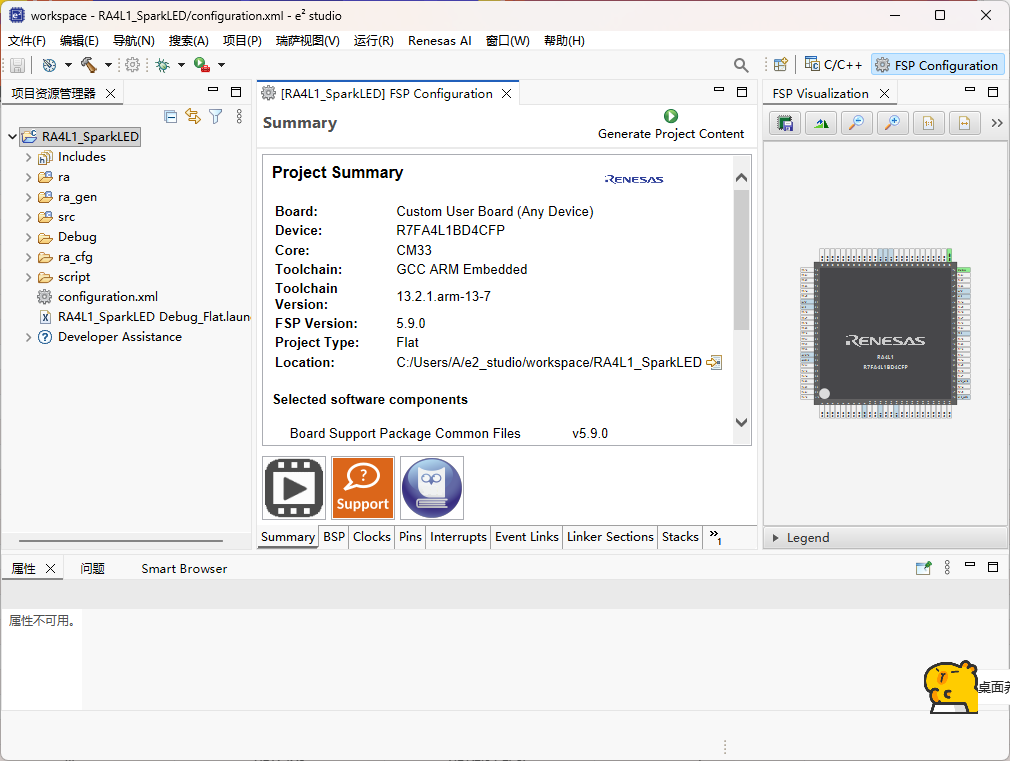
跟着教程新建工程:


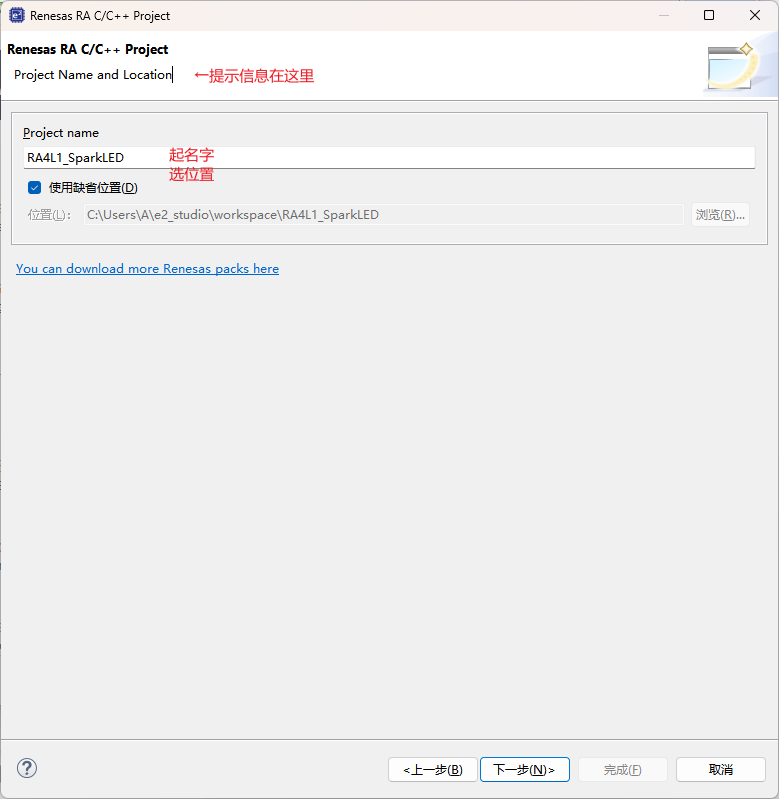
看着选吧
选我啥也没有
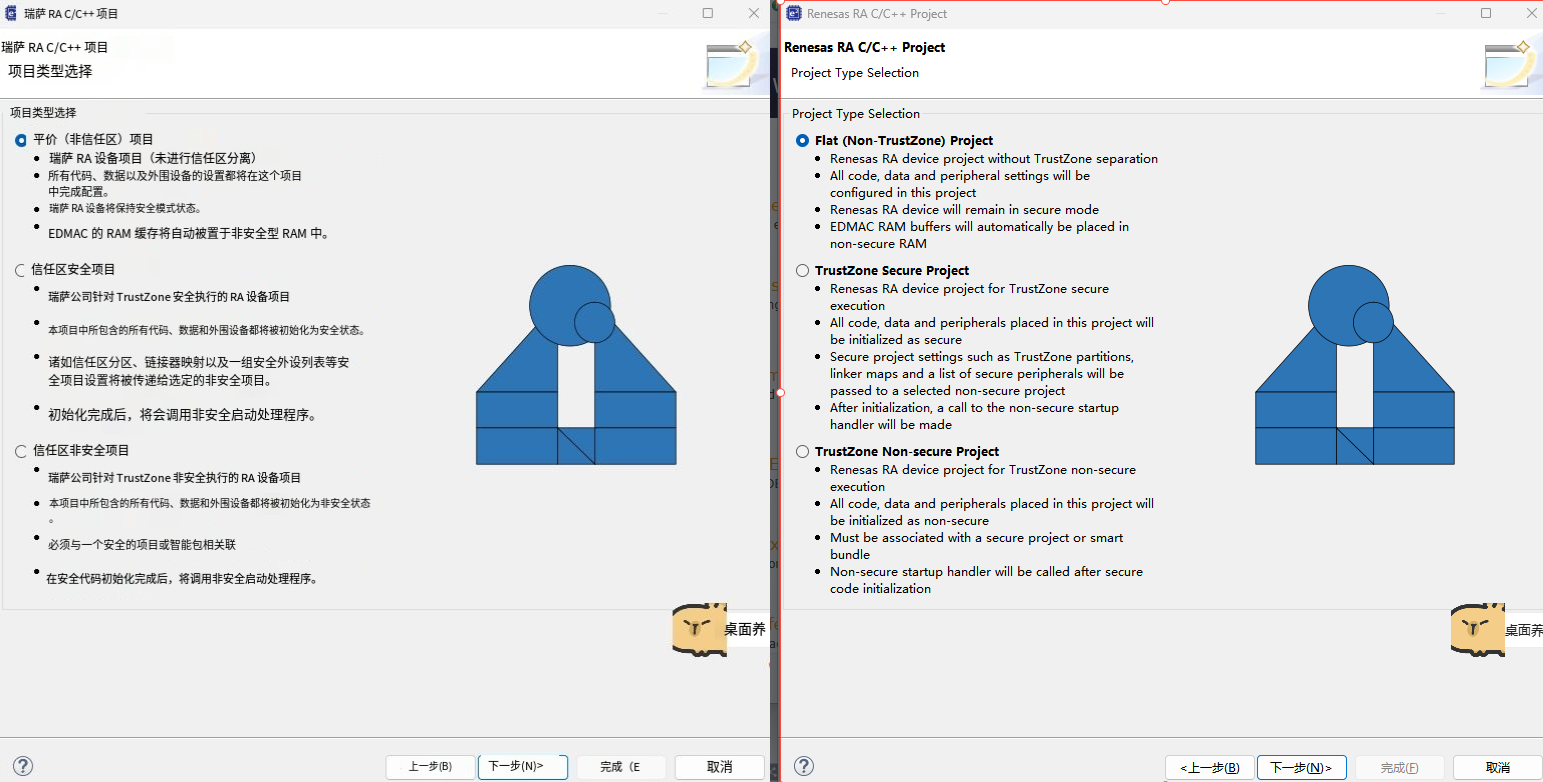
点个灯,先不用ROTS
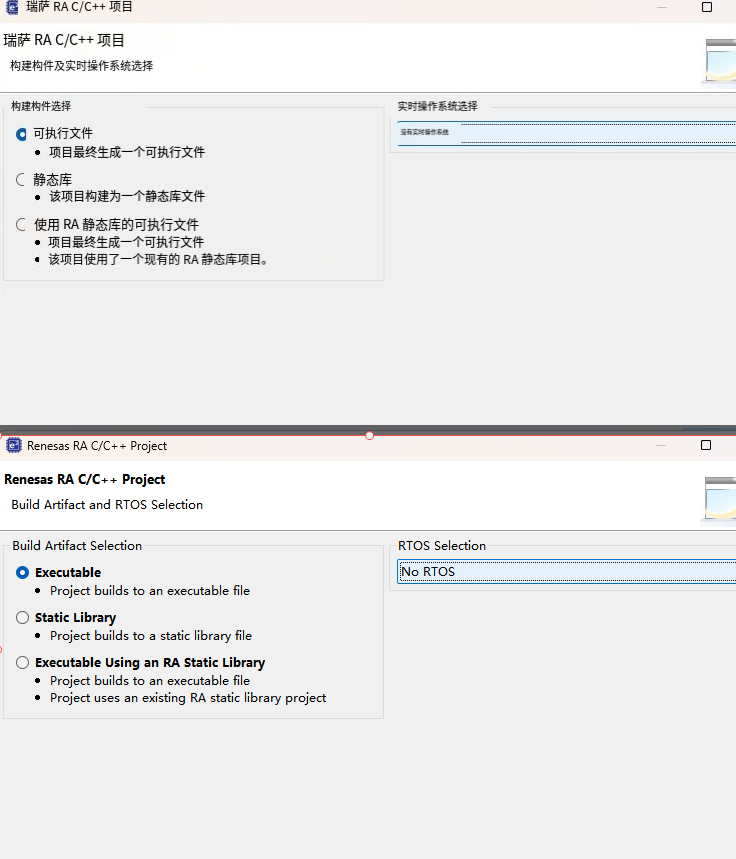
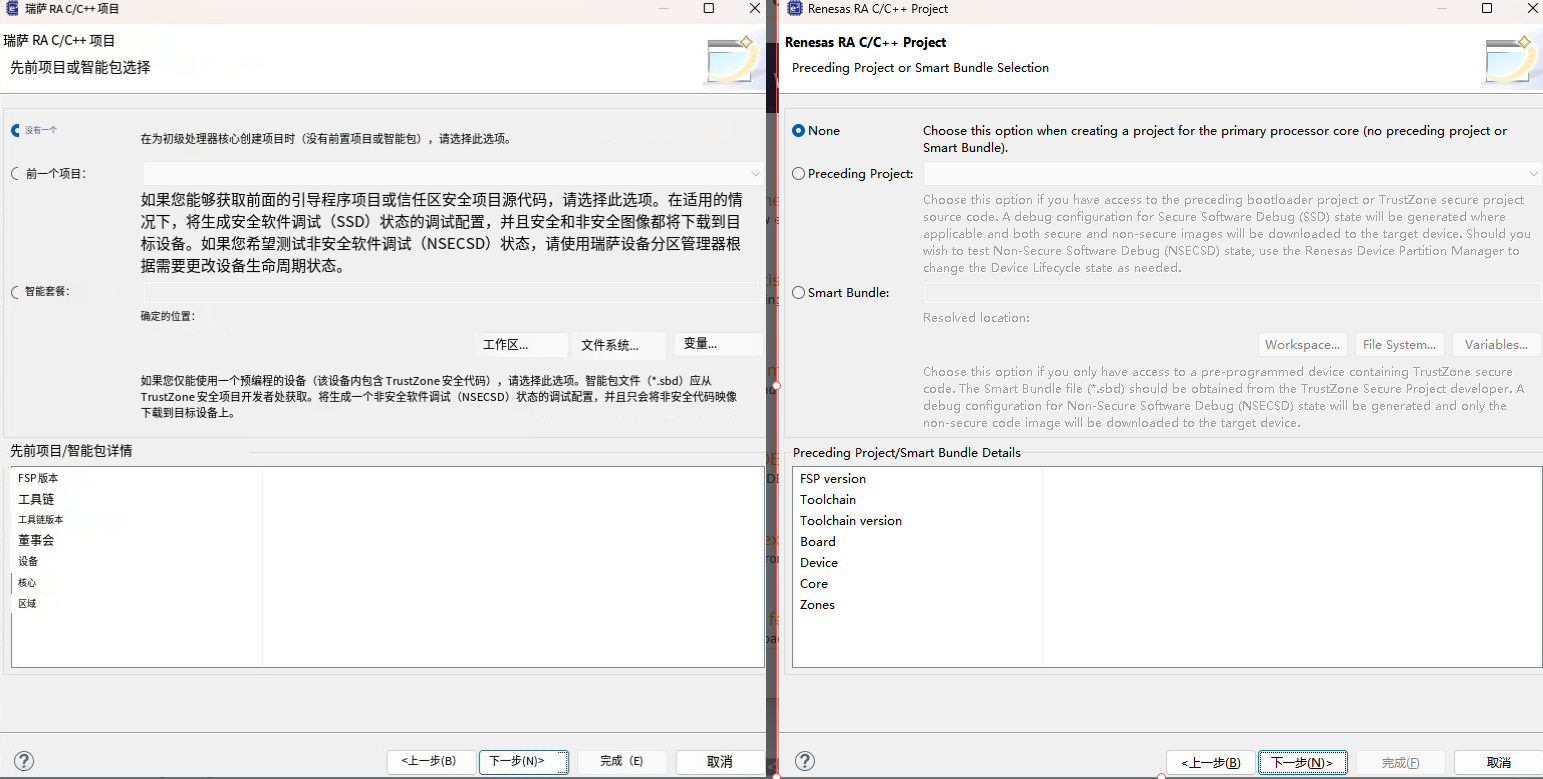
工程模版,你没得选,完成。
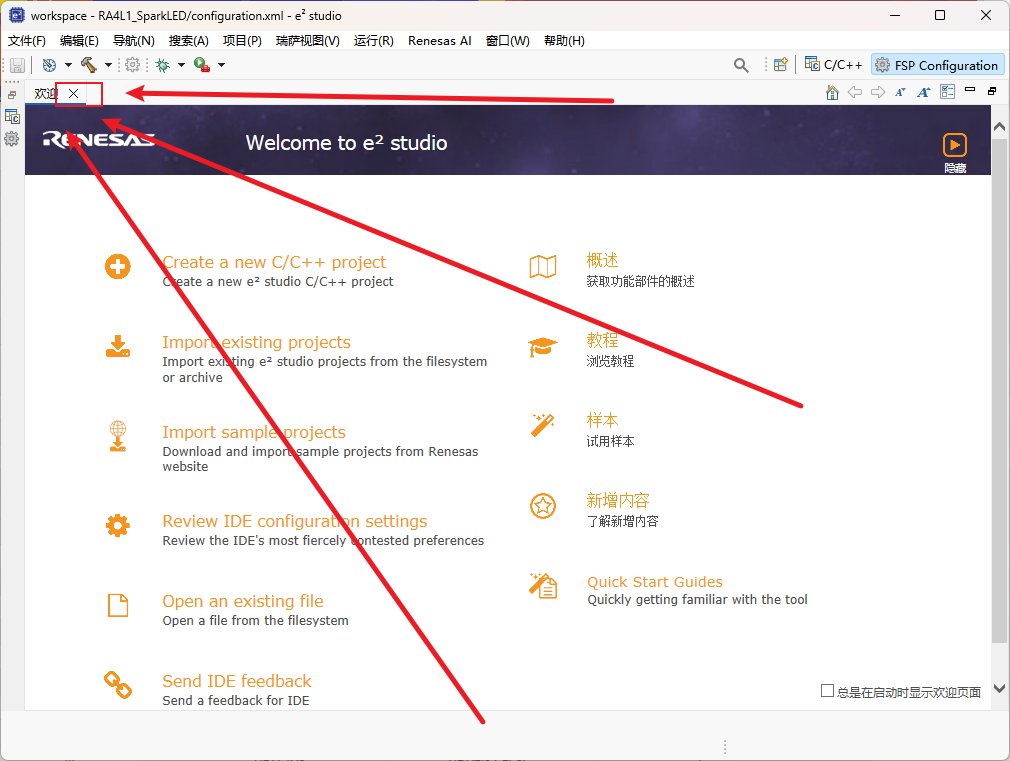
有野生吴彦祖要问了:我工程呢?这时候需要关闭欢迎菜单:
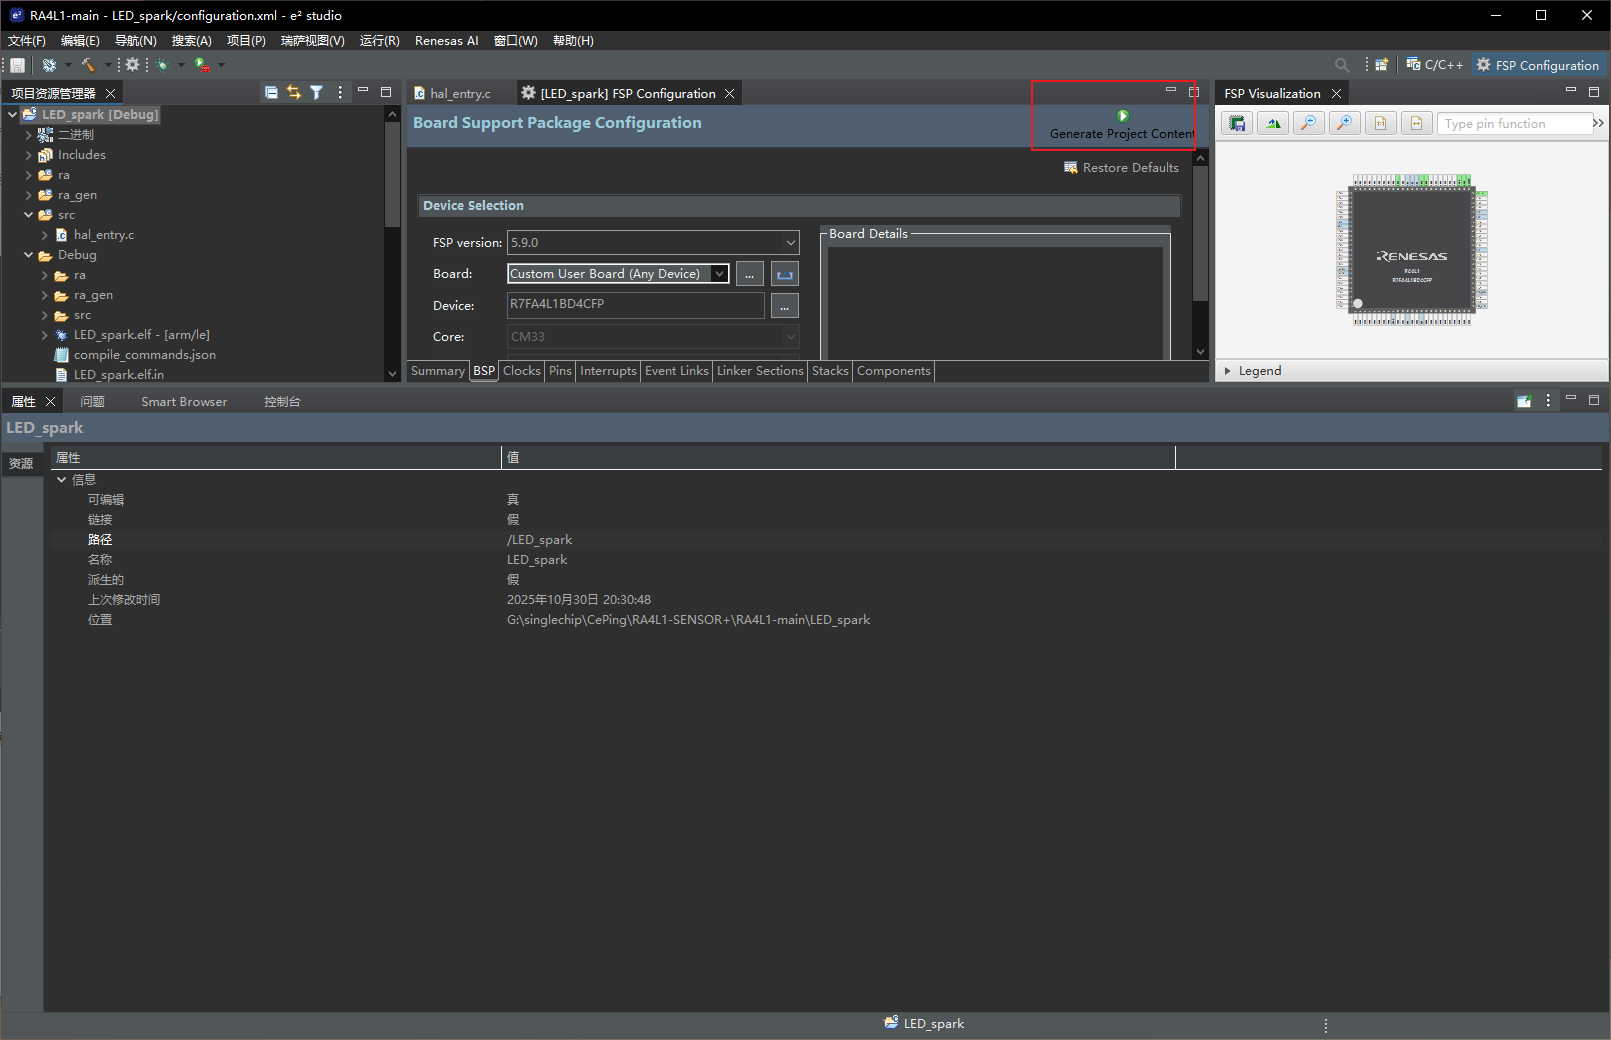
设置时钟频率为8M


配置IO
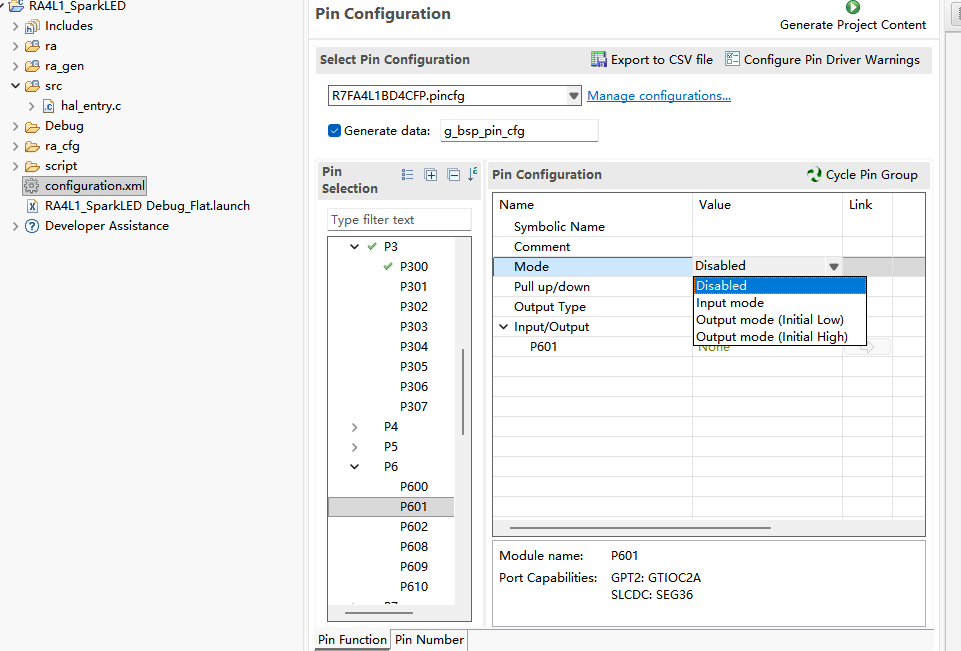

留个小坑给你们,看看你们知不知道怎么设置这个GPIO。
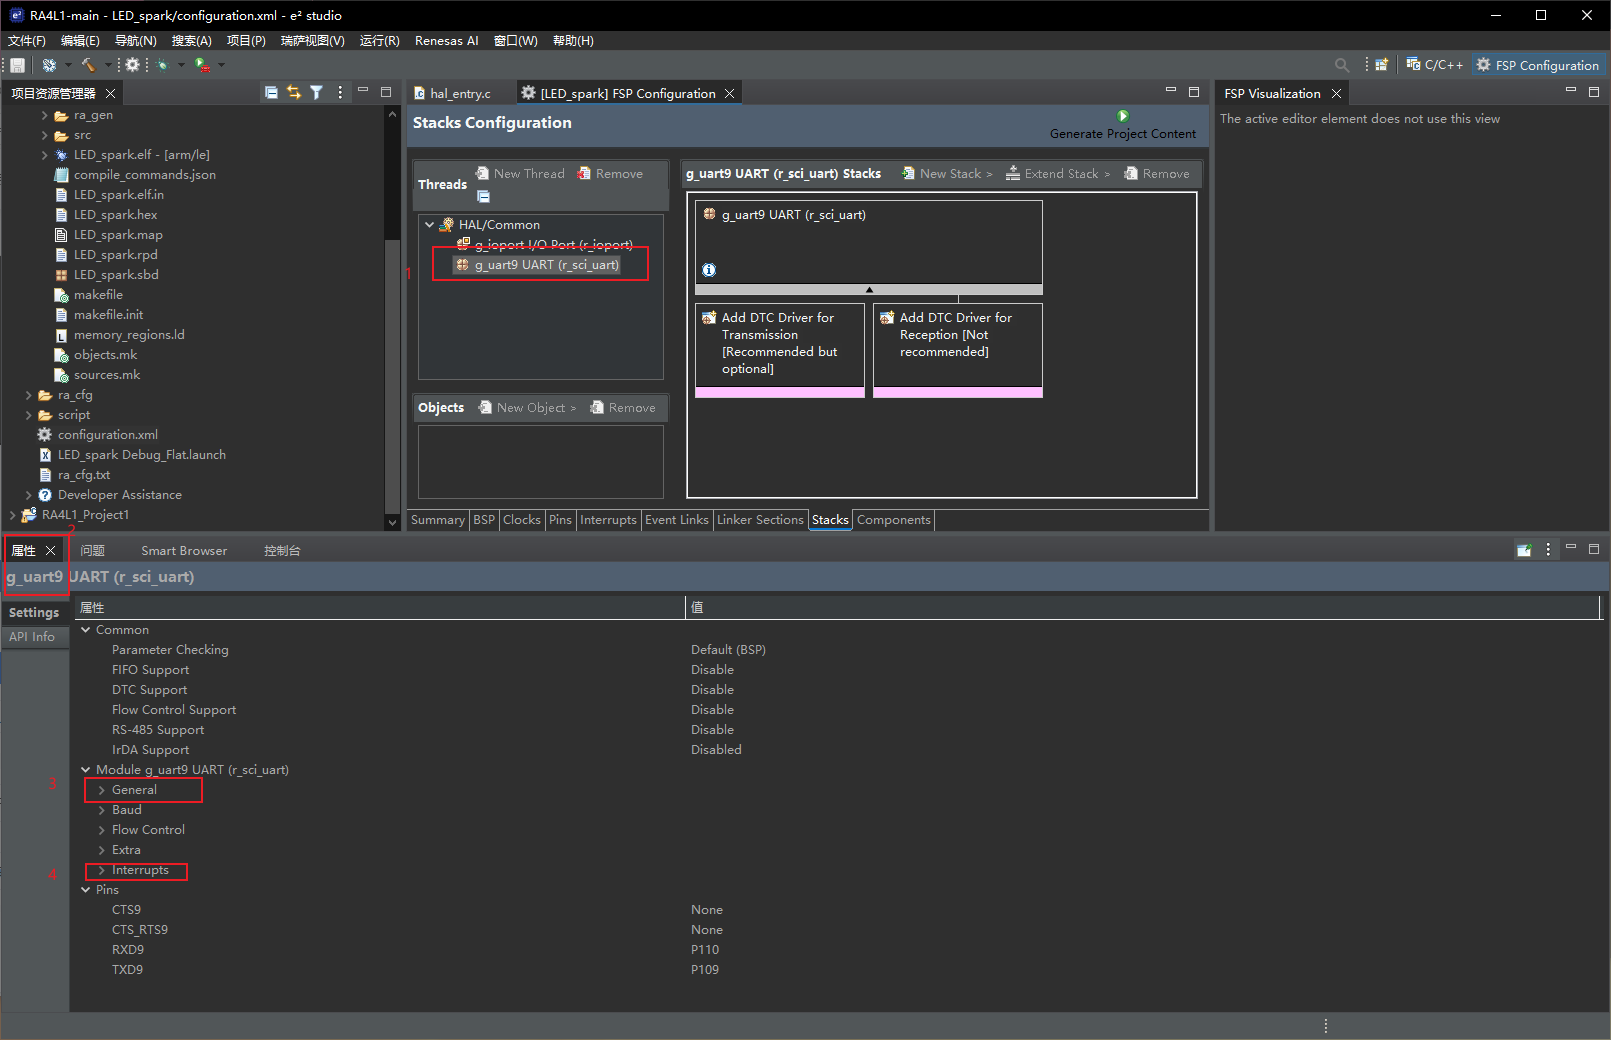
跟着教程设置完uart。。。。这个我找了好久。请看在这:
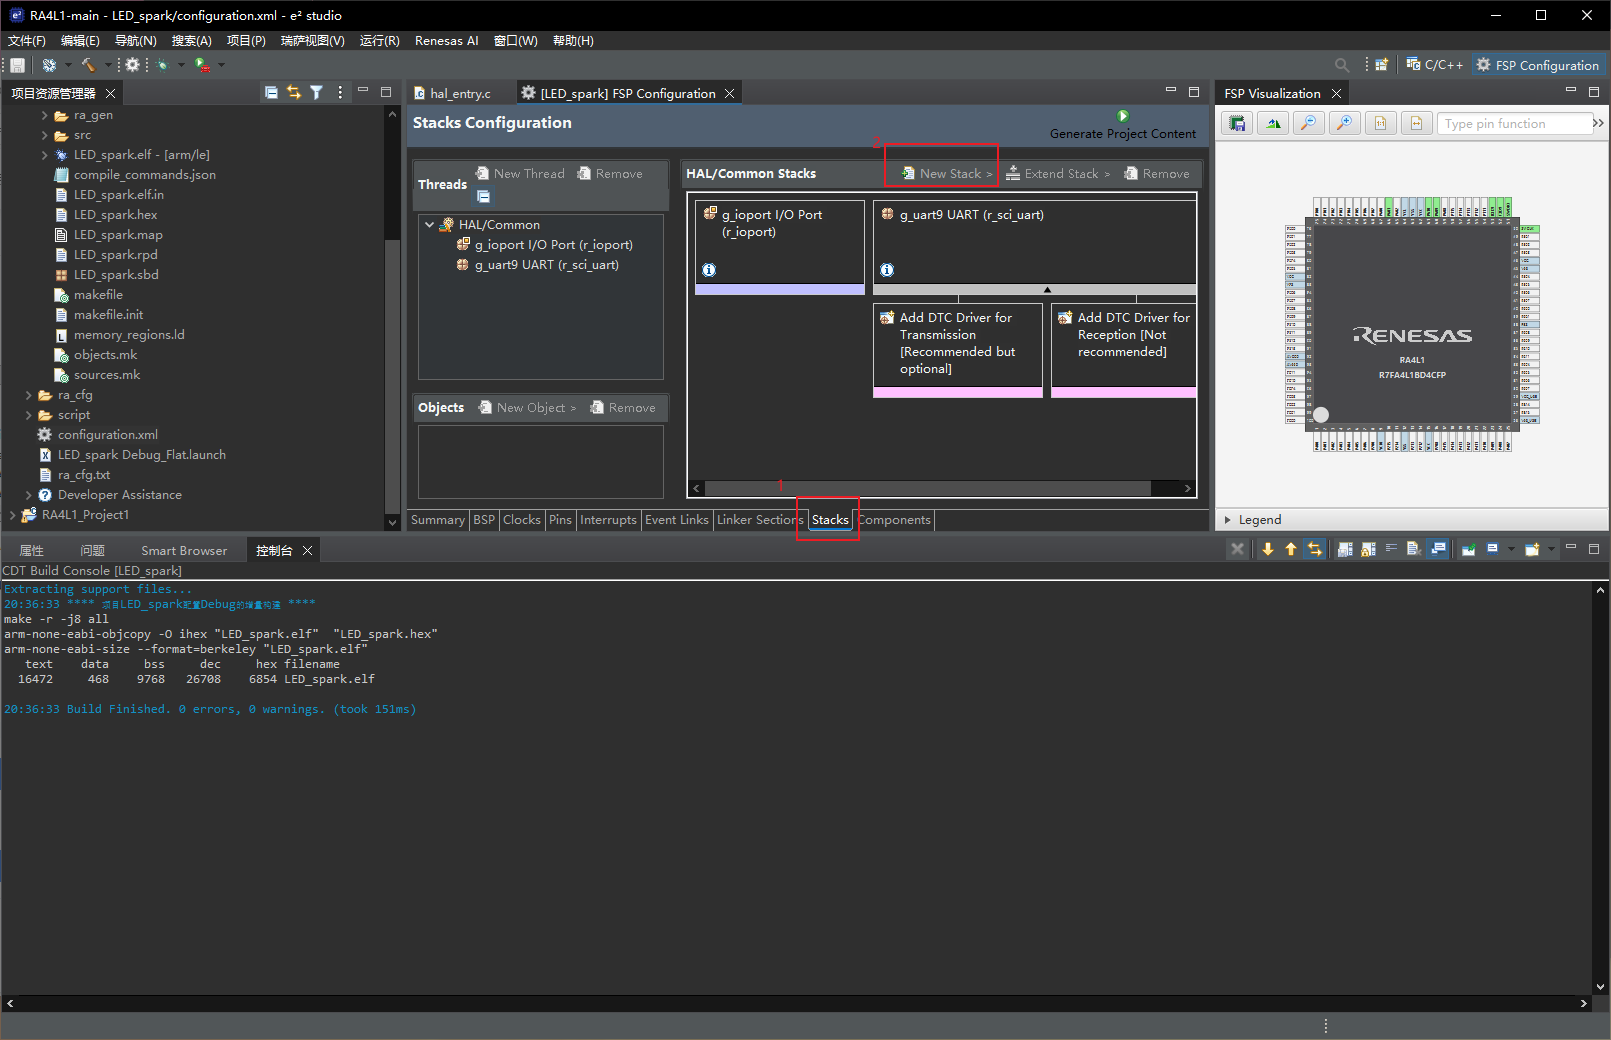

按教程设置参数

堆栈设置


使用 烧录,这个程序我放附件了。

至此点击生成工程
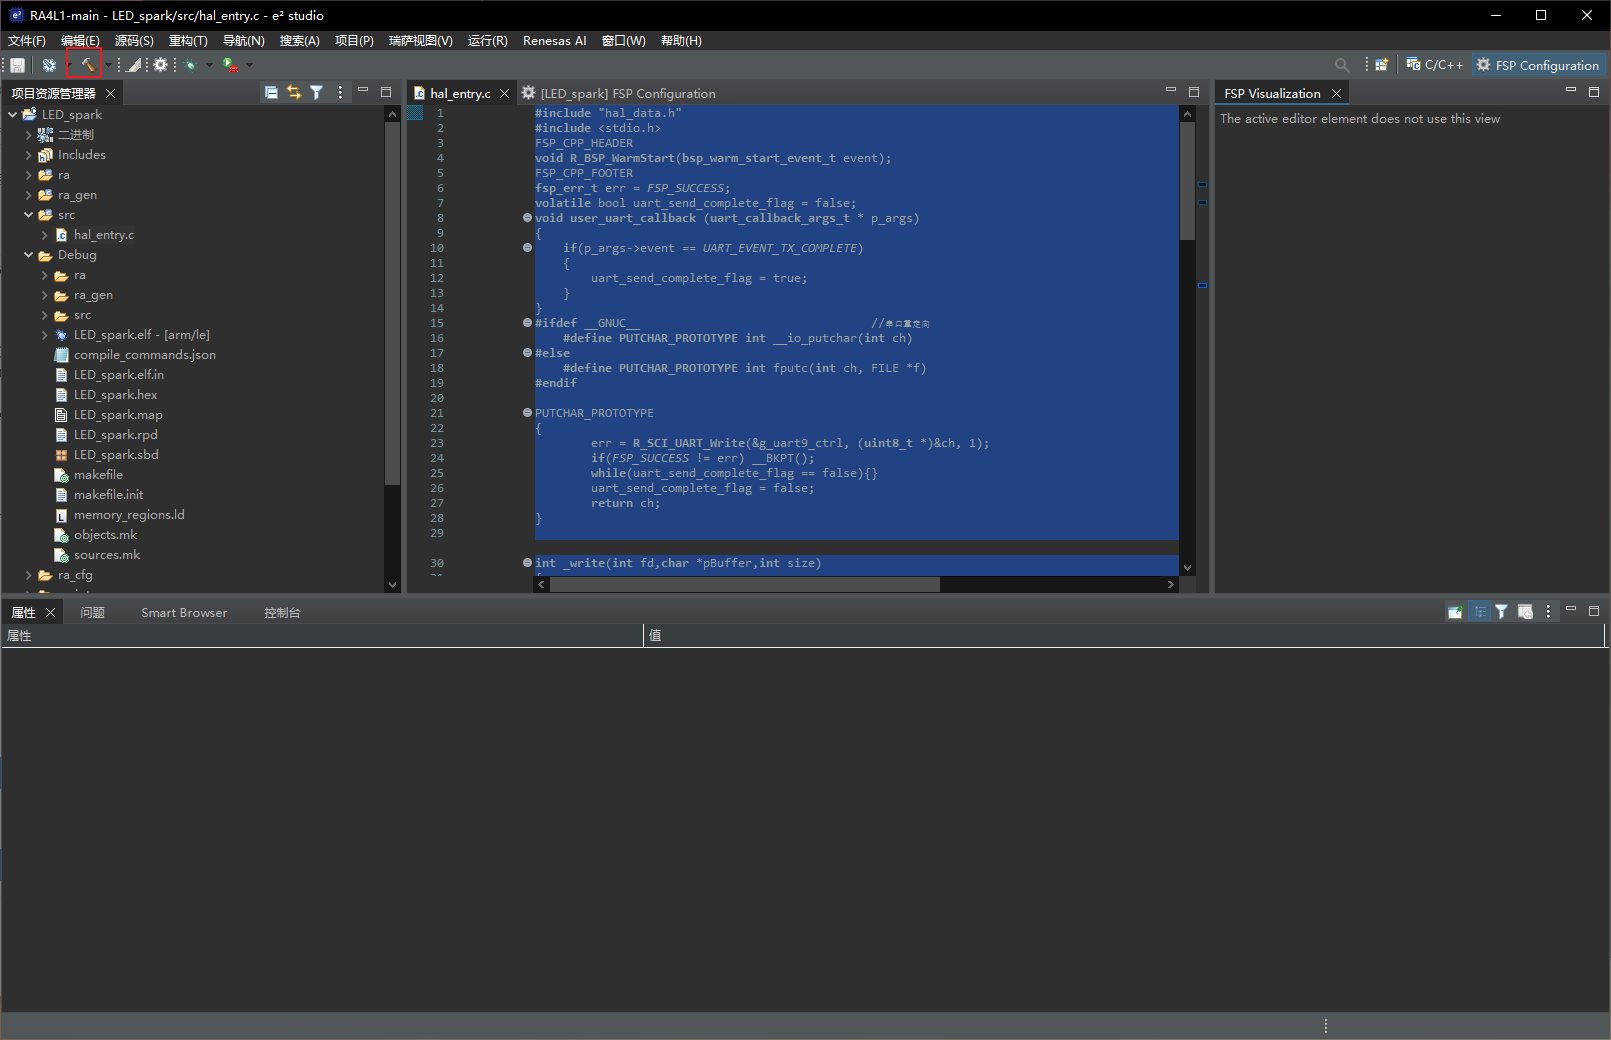
将源代码复制进src文件夹下的程序里,非main.c
#include "hal_data.h"
#include <stdio.h>
FSP_CPP_HEADER
void R_BSP_WarmStart(bsp_warm_start_event_t event);
FSP_CPP_FOOTER
fsp_err_t err = FSP_SUCCESS;
volatile bool uart_send_complete_flag = false;
void user_uart_callback (uart_callback_args_t * p_args)
{
if(p_args->event == UART_EVENT_TX_COMPLETE)
{
uart_send_complete_flag = true;
}
}
#ifdef __GNUC__ //串口重定向
#define PUTCHAR_PROTOTYPE int __io_putchar(int ch)
#else
#define PUTCHAR_PROTOTYPE int fputc(int ch, FILE *f)
#endif
PUTCHAR_PROTOTYPE
{
err = R_SCI_UART_Write(&g_uart9_ctrl, (uint8_t *)&ch, 1);
if(FSP_SUCCESS != err) __BKPT();
while(uart_send_complete_flag == false){}
uart_send_complete_flag = false;
return ch;
}
int _write(int fd,char *pBuffer,int size)
{
for(int i=0;i<size;i++)
{
__io_putchar(*pBuffer++);
}
return size;
}
/*******************************************************************************************************************//**
* main() is generated by the RA Configuration editor and is used to generate threads if an RTOS is used. This function
* is called by main() when no RTOS is used.
**********************************************************************************************************************/
void hal_entry(void)
{
/* TODO: add your own code here */
/* Open the transfer instance with initial configuration. */
err = R_SCI_UART_Open(&g_uart9_ctrl, &g_uart9_cfg);
assert(FSP_SUCCESS == err);
printf("hello world!\n");
while(1)
{
printf("Hello e2studio!\n");
R_IOPORT_PinWrite(&g_ioport_ctrl, BSP_IO_PORT_06_PIN_01, BSP_IO_LEVEL_HIGH);
R_IOPORT_PinWrite(&g_ioport_ctrl, BSP_IO_PORT_06_PIN_10, BSP_IO_LEVEL_HIGH);
R_IOPORT_PinWrite(&g_ioport_ctrl, BSP_IO_PORT_06_PIN_09, BSP_IO_LEVEL_HIGH);
R_BSP_SoftwareDelay (500, BSP_DELAY_UNITS_MILLISECONDS);
R_IOPORT_PinWrite(&g_ioport_ctrl, BSP_IO_PORT_06_PIN_01, BSP_IO_LEVEL_LOW);
R_IOPORT_PinWrite(&g_ioport_ctrl, BSP_IO_PORT_06_PIN_10, BSP_IO_LEVEL_LOW);
R_IOPORT_PinWrite(&g_ioport_ctrl, BSP_IO_PORT_06_PIN_09, BSP_IO_LEVEL_LOW);
R_BSP_SoftwareDelay (500, BSP_DELAY_UNITS_MILLISECONDS);
}
#if BSP_TZ_SECURE_BUILD
/* Enter non-secure code */
R_BSP_NonSecureEnter();
#endif
}
/*******************************************************************************************************************//**
* This function is called at various points during the startup process. This implementation uses the event that is
* called right before main() to set up the pins.
*
* @param[in] event Where at in the start up process the code is currently at
**********************************************************************************************************************/
void R_BSP_WarmStart(bsp_warm_start_event_t event)
{
if (BSP_WARM_START_RESET == event)
{
#if BSP_FEATURE_FLASH_LP_VERSION != 0
/* Enable reading from data flash. */
R_FACI_LP->DFLCTL = 1U;
/* Would normally have to wait tDSTOP(6us) for data flash recovery. Placing the enable here, before clock and
* C runtime initialization, should negate the need for a delay since the initialization will typically take more than 6us. */
#endif
}
if (BSP_WARM_START_POST_C == event)
{
/* C runtime environment and system clocks are setup. */
/* Condiv pins. */
R_IOPORT_Open (&IOPORT_CFG_CTRL, &IOPORT_CFG_NAME);
#if BSP_CFG_SDRAM_ENABLED
/* Setup SDRAM and initialize it. Must condiv pins first. */
R_BSP_SdramInit(true);
#endif
}
}
#if BSP_TZ_SECURE_BUILD
FSP_CPP_HEADER
BSP_CMSE_NONSECURE_ENTRY void template_nonsecure_callable ();
/* Trustzone Secure Projects require at least one nonsecure callable function in order to build (Remove this if it is not required to build). */
BSP_CMSE_NONSECURE_ENTRY void template_nonsecure_callable ()
{
}
FSP_CPP_FOOTER
#endif
点击小锤子生成工程。
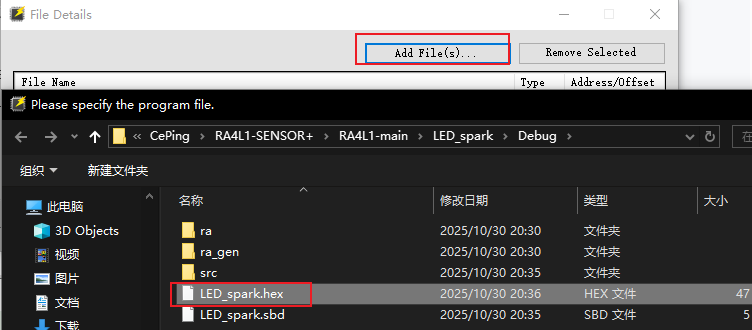
查看Debug文件夹下的hex文件属性,复制目录。

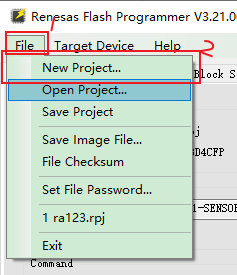
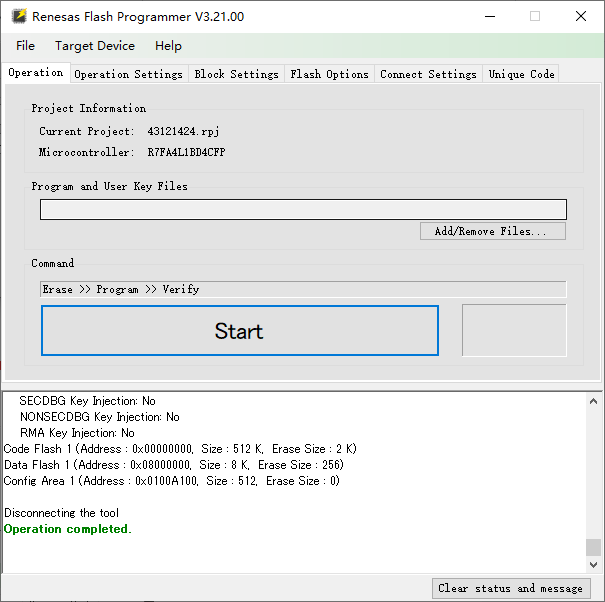
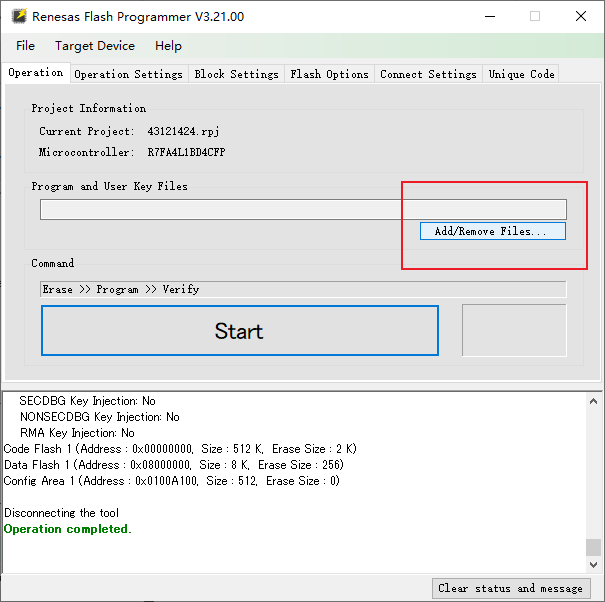
打开烧录程序:
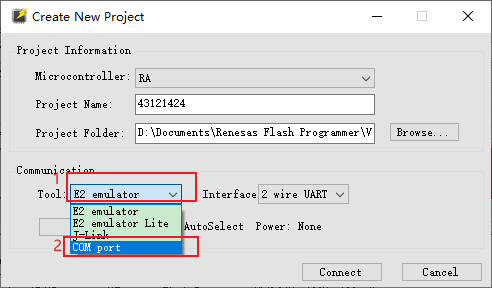
新建工程
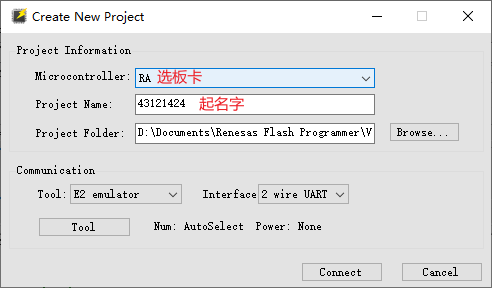
我用的USB连接
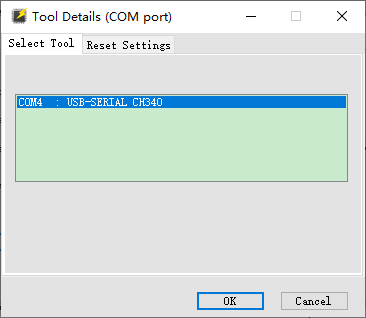
需要将BOOT引脚连接到GND,再按下RESET,再点击连接,不然报错。

图为连接成功
接下来导入工程

如果烧录失败请再点击RESET

接下来将BOOT跳线帽换到VCC侧,按下RESET即可点灯!

点灯小视频
失败问题汇总:
偷懒将CSDN教程内的主程序直接复制导致点灯失败。核对后发现两者程序不能通用,认真CV后成功点灯。
工程附件
Renesas_Flash_Programmer_Package_V32100-doc.zip
版块:
开发板测评
前3天 21:10


全部评论